Tuesday, March 31, 2009

The $5 Chandelier Experiment

Well, before I get too far I'd like to take you all off yer tenterhooks and say that the experiment was a success, thanks in no small part to the help of my father-in-law (and my mother, who didn't say, "you're going to do what to it?" and instead helped me prepare it for a makeover.) Back to the beginning. While ceiling fans are great (we know, we've been living without them), we wanted something a little closer to the ground (have I mentioned the ceilings in the old part of the house are 10 feet?) in the dining room. I'm not a huge fan of overhead lights that hug the ceiling, so a chandelier seemed an obvious option. New chandeliers, however, are expensive. I didn't like a lot of what I saw in home improvement stores. I liked some things I saw elsewhere: Pottery Barn:
Restoration Hardware:
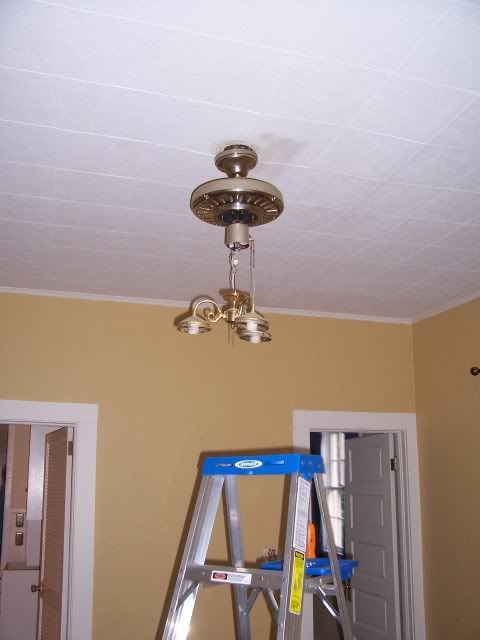
But! spending $300-500 on a light fixture would be painful, I think, even if we could. So we (admittedly) went pretty far in the opposite direction and decided to try and make a $5 chandelier we found at a Habitat ReStore work. The last vestiges of the old fan (sorry for not taking a more complete 'before' picture):
I'm having trouble finding the picture I took of the chandelier, pre-makeover, but it looked pretty much like this--only older, and having been ripped unjudiciously out of the ceiling of its former home:
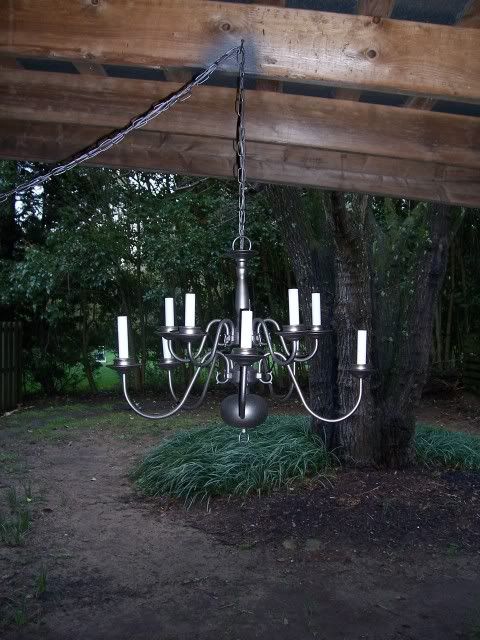
My father-in law attached a new wire and chain to the top (the old one was about 2 feet long, and since the old fan was in the middle of the room and the table wouldn't be--lest you need to crawl over it to get to the kitchen--we needed some length to swag). We then hung it in the carport to be spray-painted (which, by the way, was an interesting look; it's surreal having a fairly formal-looking chandelier hanging over the hood of your car.) I then spray-painted the whole thing, chain and all, with Valspar "Metal" spray-paint in "Graphite," which is a tad browner than it appears in this picture:
The above was taken after the "candle" sheaths were replaced. They were removeable, so we took them off pre-spray-paint and wrapped painters' tape over the bulb sockets inside. A close-up:
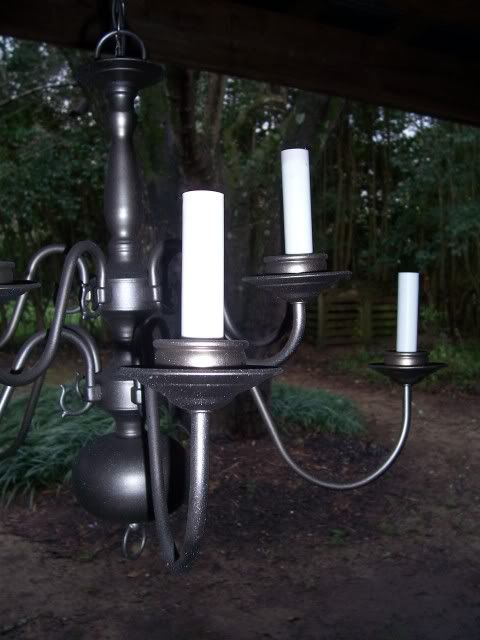
By the way, it wasn't dark when I took this. It was overcast. This was one project that was going on during the "great moving-weekend storm" that left puddles of mud inside and out, made our yard look like a convention of chia pets come to roost, and effectively splattered all of the tile-and-saw-dust from the goings-on with the floor all over the side of the house. But you know, whatever. We got a good chance to tell if there were any roof leaks. So... given the chandelier, the wiring kit, and 2 cans of spray paint (I probably could have gotten away with one, but I wanted to be sure it was as even as possible), we're now up to about $27 for the whole project. Finally, my father-in-law attached the whole thing to the ceiling where the fan had been, and we flipped the breaker. Success! In situ, with ten tiny shades attached (these we found at Lowe's):
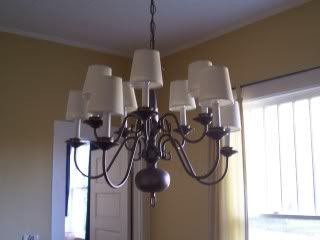
Not too shabby, for a total of about $60 (including the shades, which weren't strictly necessary, and the extra hardware for the swag hook, which needed to be longer than the one in the kit due to how the ceiling was constructed). We're really pleased with it, and it makes the room look a whole lot different. So.. lessons learned, I guess--it's great to have a family member who's handy with the electrical stuff (had we not--I'm thinking of that Pepsi Max commercial. "Ready?.... Nooo."), and don't try to spray-paint the underside of something while your face is four inches away from it and upside-down. Especially if you wear contacts. My eyeballs haven't fallen out yet, but it was iffy there for awhile. More pictures to come, once the room is clear of boxes and we get the table/chairs in place. Thanks to all who helped!

Monday, March 30, 2009

WHAT GIVES.

This leaving-The-Dog-with-the-laundry? I have four words: YOU FORGOT THE LOVESEAT. I flap my door in your faces.

Goodbye, Tile Floors (The Resolution)

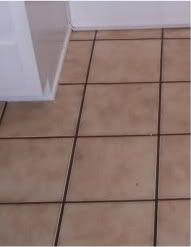
The Tile is Gone. The guys came a day early and started ripping it out, and it turned out to be pretty much as bad as we thought (or worse); they basically had to chip out the tile with something that looked like a crowbar, then come back the next day with things that looked like giant car-window ice scrapers to scrape off tile cement that was underneath. They kept having to sharpen the things on a saw to make them useful. Anyway, scraping out the cement and tile meant that the kitchen, family room and screened porch were completely coated with a substantial layer of orangish tile dust for about 24 hours there--and tile dust, I might add, neither smells good nor does it make for particularly nice breathing. I'd be lying if I said we had any regrets about not doing this ourselves; I'm pretty sure we would have given up when the scraper got dull. Anyway, I took some pictures mid-scrapeage. But first, a visual reminder of what used to be:
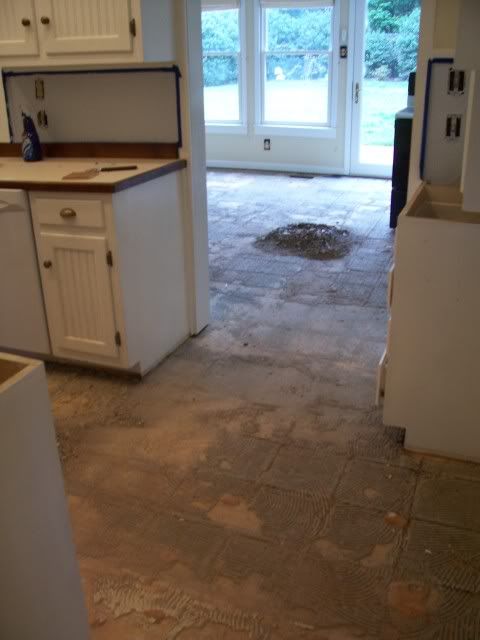
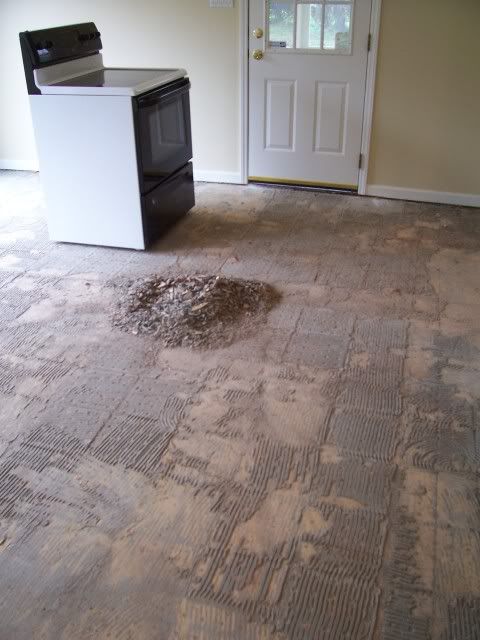
Inside, with the tile gone but a lot of the cement intact:
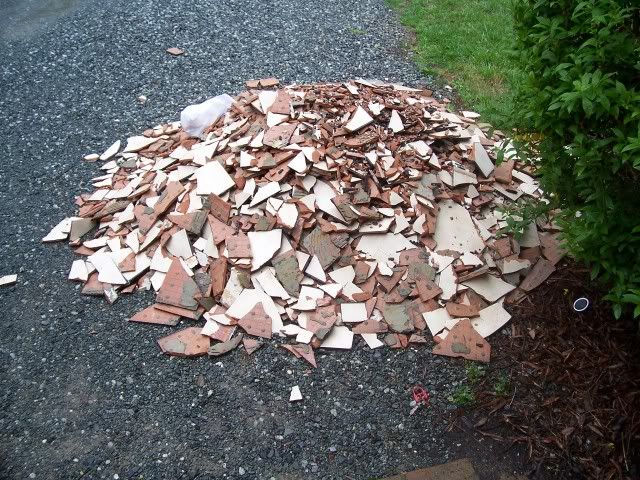
The pile of tile accruing in the driveway:
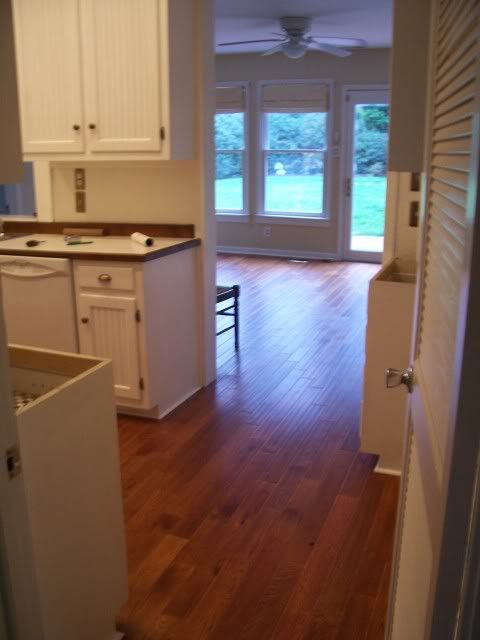
After all that was done, the flooring went in pretty quickly. We were around, trying to complete some other projects, and it seemed like every time I went back there was another third of the floor done. So, (drum roll, please:) THE FINISHED FLOOR.
We absolutely love it. It's beautiful--it makes such a difference in those rooms; they're so warm and inviting now, even without anything in them. SO much better than "public restroom" tile. The Captain, however, is reserving judgment. But then, he's generally resistant to change:
It seems really, really solid and we really love the texture of it. We found that none of the samples we'd seen (even the 3' x 6' one in Home Depot) really did it justice--the variegation is really cool and the color is much warmer on-site than it seemed under the home-improvement-store halogens. Three cheers for new flooring! Where 'toughness' is concerned--we moved in this weekend, and it did withstand a washing machine falling off a dolly with no scratch at all. We tramped in and out many many times from the gravel driveway carrying boxes and pushing handtrucks, and I haven't seen any signs of wear--though right now, most of it's covered with boxes, so I suppose we won't really know until we can see it again. (MWAH, HA HA HA HA! Ha. Ha. Sob.) So, to summarize, we used Home Legend 3.5" Click-lock engineered hardwood in gunstock oak (as far as I know, only available at Home Depot), all-in-one pad/moisture barrier underlayment, and white composite quarter-round. We hired out the tile removal and the floor laying, but we took responsibility for buying/hauling all the flooring and materials and the Mr. did the quarter-round trim himself. He would like me to mention that hammering composite quarter-round (which, apparently, is harder than the regular stuff) into the space between the bottom of the kitchen cabinets and floor is somewhat less than fun ("If this crap was on Facebook, I'd reject its friendship," I believe he said) and the process may have resulted in our second home-improvement related injury. We're hoping he regains the feeling in that thumb. I think that's it! It was our big pre-moving-in project, and having it done is amazing. More pictures to come when the boxes are gone and the furniture is in.

The Guest Bedroom: Before & After

Alright! So after a slight hiatus (more on that later), I've got a whole mess-o-updates to make. As promised, here are some before and after pictures of the Guest Bedroom: Before The Mr. and I taped and primed it, it was a light purple-y gray:
...and it had a cream-colored berber carpet:
Mom and I then painted it a very light green (Valspar, "Sweet Kasha"):
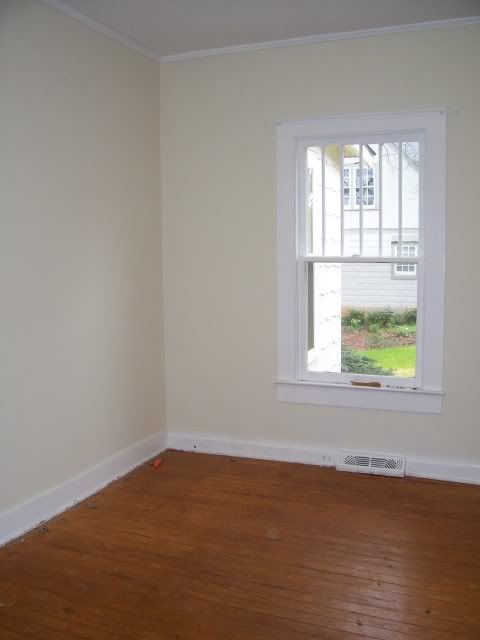
... and then The Mr. and I ripped out the carpet. The Mr.'s mom and dad helped us remove the old carpet padding staples, tack strips and some strips of double-sided tape goo. The final result (pre-move-in):
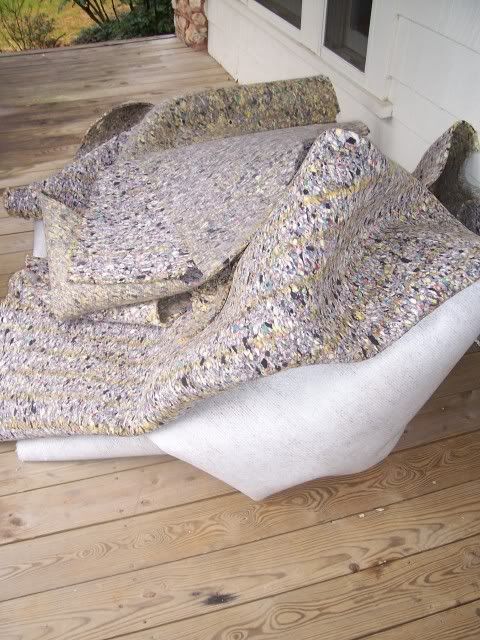
I think it's quite the improvement! I'm really happy with the color, and the hardwood floors are beautiful. We waffled about ripping up the carpet--even though our preference is hardwood, we really don't mind carpet in bedrooms and despite being slightly dingy the berber wasn't in terrible shape. It is, actually, still with us:
NB. Find out where the nearest dump or recycling center is prior to tossing large amounts of refuse on your porch. Anyway, we took the gamble and the hardwood is in pretty great shape. We'll have to figure out something to do with the threshold between the room and the closet; there's an area there that either didn't get stained with the rest of the floor or was stripped at some point. What do you think? Miss the purple?

Thursday, March 26, 2009

GRASS = AWESOME.

Ommm, nom nom nom nom. [HORK].

Goodbye, Tile Floors! (Almost).

So there's no longer a question of whether we're getting rid of the tile or not; Saturday's the day. I'm a little bamfoozled that somebody comes to your house and where 5 hours before there was one floor there is suddenly another. Bamfoozled, but excited. We chose option number 3 (see the tile post from before):
It was a tough pick, but in the end what tipped the scales were three new product reviews on Homedepot.com. That sounds ridiculous, but somewhere three people have no idea they just helped us make a huge decision. It's somewhat a leap of faith, too, because, well, these people could have nothing in common with me taste-wise, but we really were having such trouble deciding that it really did come down to that. Ah, social web media. So anyway, mom helped me heft 15 whopping boxes of hardwood floor into the house, which looks like a lot, and isn't really; only about 300 square feet. Here it is, looking all full of potential and ready to go places:
Sidebar: my advice to ye-who-might-be-considering-the-costs-of-putting-in-hardwood: don't underestimate the cost of the trim. You can get away with white (or whatever color your baseboards are) quarter-round moulding, but the transition pieces (t-moulding and reducers) have to match. The floor itself may be super cheap per square foot, but they sure as heck never discount the trim. AND it adds up, because you pretty much need one length for every doorway. That's the update. More to come!

Four Green Chairs, ISO Large, Fun-loving Table.

"Hi."
As we have never before had a dining room to call our own, it might come as no surprise that we had no dining furniture. Call me naive, but I didn't realize that SIDE CHAIRS could cost $200 (or more!) APIECE. Thus, our outlets for finding dining furniture have looked more like thrift stores and consignment shops. Which, actually, has been really fun. I'm kind of picky about this, and won't order anything online without seeing it first--this is our first house and the first time we've actually been responsible for finding our own furniture to serve a specific purpose. Thus! We were really happy to find this set of 4 (green!) side chairs for a steal at a local shop. They'll be the first of a set of chairs that we'll be able to use not only as dining chairs but extra seating throughout the house. The wall color in the dining room (hard to tell from this photo) is a kind of mustard-yellow, so they complement it really well. When we bought the fabric for the upholsterer, I also found some more that blends this emerald green with mustard yellow AND a soft cadet blue--something that will coordinate our dishes (and the new kitchen wall color--but more on that later) with all the green and yellow. What'll we use the fabric for? Seat cushions (or covers, if we find chairs we like that have upholstered seats), a piano bench seat, or a curtain panel--BWA, HAHAHAHA. The chairs are table-less right now, but they shouldn't be after this weekend. Pier 1 has an amazing table (big, slab-top, distressed--everything we were looking for) that we'll pick up as soon as we have the vehicle to do so. We weren't looking for too formal a table; this is going to have to serve every purpose we could throw at it--breakfast, dinner, crafts, games, easter-egg dying--so we wanted something we wouldn't always be worried we'd ruin. This is a horrible picture, but should give you an idea (fyi, it's Pier 1's "Torrance" table, and it's big--84" by 42"):
I think that's it re: Table and Chairs. Will post pictures once table has arrived and is constructed...

Wednesday, March 25, 2009

The Fauxfa, Redux

Alright, so I know I'm in arrears with my promised posts. Consider this a bonus. We are now the proud owners of a multi-generational piece of furniture, lovingly referred to as the "fauxfa." Not quite traditional sofa, not quite futon... in a class of its own, really. Seriously; by "class" I kind of mean "weight class," because BOY, they don't make sofas like this anymore. I think it's mostly steel. Anyhow, so the thing folds out into a sleeper kind of like a futon, but is completely upholstered, and the seat and back are more like a mattress (it does have springs) than a cushion. Those of you who know it are like, "ah, yes," and those who don't are really confused. We're gaining two rooms in the place of one with this house; we have a living room, and a 'family' room. The family room is smaller than the living room, but in the back of the house where the doors to the screen porch and patio are, as well as the kitchen. We figure we'll be back there more than we're in the living room at the front of the house, but our large couch and loveseat won't fit in the family room. SO. Enter the fauxfa. The fauxfa was the only couch in my old apartment (before I met the Mr.!) but since then languished in our office for close to two years--bedecked in a dingy, fraying, once-very-expensive striped upholstery fabric. Besides playing host to the occasional third houseguest and holding the Mr.'s feet when he does his situps, it's been a place to throw bags, coats, magazines, our beloved cornhole boards... you get the picture. Well, no more! We considered buying new furniture for the family room, but if we did that, we'd have to get rid of the fauxfa--something that made us kind of sad. It has such a history. (Mom can remember at least two prior upholsterings.) It's actually kind of comfortable as a bed, and, well, as I said before, they don't make 'em like they used to. I called and got a quote for having it reupholstered. ("Halt," you say--"aren't you making slipcovers or something?" Yes, and that's fodder for another post. However, the way this thing unfolds... my brain explodes trying to think of how I'd make a slipcover for it and keep it functional.) The upholstery folks were great, but understandably confused by my description (it was also difficult to refrain from calling it the 'fauxfa.') I ended up having to fax them pictures of it in various stages of movement: Great, huh? So. Upholstery is, yes, expensive. It's not quite as expensive as buying a new couch, though (especially a sleeper). We decided it was a good compromise. We're now really excited about having it in what will probably be our most-used room. We got to choose the upholstery fabric, which was difficult; it's really hard to try to anticipate whether a giant piece of furniture covered in fabric A or fabric B (or C or D or.. you get my point) will look good, or stupid, or whether we'll hate looking at it in a matter of days. The expense means there's a lot riding on the decision. What we picked might come as a surprise. It's plaid, which for those of you who know me will make all the sense in the world. It's not a crazy plaid, but pretty large-scale... and (I'm realizing that I'm painting a very odd picture with this) mostly orange. Yep. Giant orange plaid. I promise, though, I really think it'll look good. I hope. We're having the buttons on the back (the back is tufted in four places) replaced with slightly larger ones, and we're doing away with the skirt. It will look like a completely different piece of furniture when it's done, that's for sure. The upholsterers picked it up yesterday (three cheers for free pickup and delivery!) and we'll get to see it in a couple of weeks. Cross your fingers, and look for an "After" post!

Monday, March 23, 2009

FORTITUDE.

So many choices. So far, back corner seems likely. Furthest away. Shady. Big. The brown-haired one is hiding the tall one someplace. Suspicion! Eyes in the back of my head, toots; I mean it, I'm going to--bee? Anyway, you should--BEE. Hold on.

Updateration

Okay, many apologies for the delay. Until yesterday, there hasn't been much to report; the Mrs. took a break this weekend to visit with her parents (and, apparently, refer to herself in the third person). However! Mom and I were industrious yesterday evening, and between sunning on the back patio and watching the dog try to decide which bush to make His Fort, we got the guest room painted! Pictures forthcoming; we left before it had dried and lest my blog readers believe us to be a) horrible painters or b) fans of the "mottled" look, I decided to take pictures during our next visit. The color is an interesting one; it was the top swatch on a Valspar sample that went all the way down to a deep olive green--"Sweet Kasha" is the color name, whatever that's supposed to invoke. (Sidebar: have I mentioned that I almost painted the kitchen "Moby Dick?" Being the paint-company color name-er must be interesting.) Anyway, the color reads as creamy white when it's not next to something that's really white, but next to the white trim it has the slightest trace of spring green. I'm pretty happy with it. The walls had been a peaceful lavender-ish gray, but since all of the bedding and such that we have for the guest room is green we figured we'd do well to change it. I think that's it for now, but here's what's coming up:
  • The Guest Bedroom, before & after
  • The Great $5 Chandelier experiment
  • Painting the Kitchen, or: 'Adventures in Hiding the Goofs I Made Whilst Trying to Trim Wallpaper With A Dull Blade.'
Excited?

Wednesday, March 18, 2009

Goodbye, Tile Floors?

I started off on a wallpaper rant, but the actual first thing on our do-before-we-move-in list involves flooring. The rear addition of the house (added sometime late 70s, early 80s?) has a tile floor, that a previous owner extended into the kitchen. You can see it in the pictures in the wallpaper post. It's not bad tile, and it's been kept very clean--but it's showing its age, nonetheless (do people do half-inch-wide, black grout anymore?). We'd like to replace it with some hardwood flooring product. That was intentionally vague, because, as always, there are a slew of befuddling options. On Monday we had an in-home consultation by a guy we found through Lumber Liquidators. He pulled up the in-floor HVAC vents and looked at the cross-section of subflooring, and we think we might have lucked out: the tile isn't mortared to the actual subfloor, but to an additional layer of plywood on top of the subfloor; as far as I understand it this means we won't necessarily have to chip out all the tiles and cement--just the stuff where the plywood boards meet. SO, labor estimate in hand (we're still considering doing some or all of this ourselves, but we have to admit it's tempting, given that it was actually lower than we expected) we're ready to choose a floor. We don't have moisture or concrete subfloor issues to deal with, so we really have our choice. However, this area encompasses the kitchen and three exterior doors, if you count where Captain Muddypaws will be entering from the yard. An additional consideration is leveling; the floor, especially in the older kitchen area, is noticeably sloped. The flooring guy's recommendation was a floating floor--since the house is likely to settle more, and in different spots. It's sounding like an engineered, prefinished product is our best bet. Now the hard part is finding one we like, that doesn't clash with the rest of the house's beautiful old heart pine floors. We decided it didn't need to match, exactly; just flow from one to the other. We'll be trying to make the big decision this weekend. Here are the frontrunners: Bruce Turlington 3" Lock & Fold, "Wild Cherry/Brandywine" (Hickory):
Bruce Turlington 3" Lock & Fold, "Gunstock" (Oak): and Home Legend 3.5" Hand-scraped Click-Lock, "Gunstock" (Oak): Honestly, I think we'd be happy with a lot of things, as long as there's not half-inch black grout involved. More to come!

Tuesday, March 17, 2009

WET.

The brown-haired one keeps making me use large flapping door. I'd rather stand in rain.

Wallpaper, or: "Sometimes it's there for a reason."

The previous owners of our new house had pretty great taste. The wall colors are nice, neutral and understated (not to mention well-painted). The trim is a nice creamy white, even the window treatments I'd have probably picked out. In the kitchen, though, below a piece of trim about four feet up the wall, was a faux-tile wallpaper (...that I rather famously thought was real tile--yes, until I actually touched it. Score one for the wallpaper). I'm not a huge fan of wallpaper, so first item on the agenda: down she comes. We highly recommend 'WP CHOMP!' brand wallpaper stripper, which not only works well, but is fun to say when particularly large parts of paper fall off with little effort. ("Narghnarghnargh-wp!-CHOMP.") It also smells like Bacardi O, but I don't recommend drinking it. So.. the problems arose the more paper we got down. It turned out that the backsplash, the wall next to the refrigerator, and the wall behind the stove used to be tiled. How could we tell? There was still a good bit of grooved adhesive on the wall. I have no idea how old it is, but it's pretty petrified and chemicals haven't seemed to make any difference. You'd be able to see the texture under the paint we'd picked out. We thought briefly about sanding it--as messy as that might be--but in the end, decided that the slim chance that the stuff contained asbestos was worth pursuing other options. 'Other options' turned out to be 1) removing the wallboard and replacing it, or 2) recovering the areas. Since we'd like to retile at some point, but can't afford it immediately, we opted to 'recover.' Beadboard, likewise, is a little expensive for our needs--so we decided to go with a paintable wallpaper. Yes, wallpaper comes down, and more goes up. That might seem inefficient, but I'm telling myself that this stuff is 1) made to be painted over, and 2) mostly vinyl, which sounds good from a kitchen-cleaning perspective. It's available in a lot of goofy textured patterns, but we took a chance and went with one that's supposed to look like pressed tin. I was surprised by how well it went up, actually; I've never hung wallpaper before and I think we managed to do it pretty well. (The true test will be when we go back this evening to see how it's dried.) Here are some pictures of a wall, still wet; once it's painted, the contrast between the raised vinyl parts and the backing won't be visible, but for now it looks kind of interesting. A closeup: From the other side of the room: Next steps are painting, and a good washing-down of the floor and baseboards (wallpaper goo gets EVERYWHERE). Oh, and don't underestimate the the dangers of wallpaper: I managed to sustain my first home-improvement related injury from the stupid trim guard. Post-painting pictures to come.

We Have a House

So, last Thursday, we bought a house. It was a little surreal; there were words, a lot of signing things, some large numbers, more words... and then there were keys. Sitting in the empty house for the first time, knowing it was ours, was pretty exciting. Or scary. Or both. So what do you do with an empty house you can't move into just yet? (The Mr. has a business trip in a few days and we'll move after that.) You start making plans. And going to Lowe's. Now, after spending a bunch of money on stuff we didn't need when we could make 'maintenance requests' of our landlord (and have a glass of wine while we waited for them to show up)... we have begun. Read on--our hope is to document with this blog our first foray into the world of property ownership.