Well, before I get too far I'd like to take you all off yer tenterhooks and say that the experiment was a success, thanks in no small part to the help of my father-in-law (and my mother, who didn't say, "you're going to do
what to it?" and instead helped me prepare it for a makeover.)
Back to the beginning. While ceiling fans are great (we know, we've been living without them), we wanted something a little closer to the ground (have I mentioned the ceilings in the old part of the house are 10 feet?) in the dining room. I'm not a huge fan of overhead lights that hug the ceiling, so a chandelier seemed an obvious option.
New chandeliers, however, are expensive. I didn't like a lot of what I saw in home improvement stores. I liked some things I saw elsewhere:
Pottery Barn:
Restoration Hardware:
But! spending $300-500 on a light fixture would be painful, I think, even if we could. So we (admittedly) went pretty far in the opposite direction and decided to try and make a $5 chandelier we found at a Habitat ReStore work.
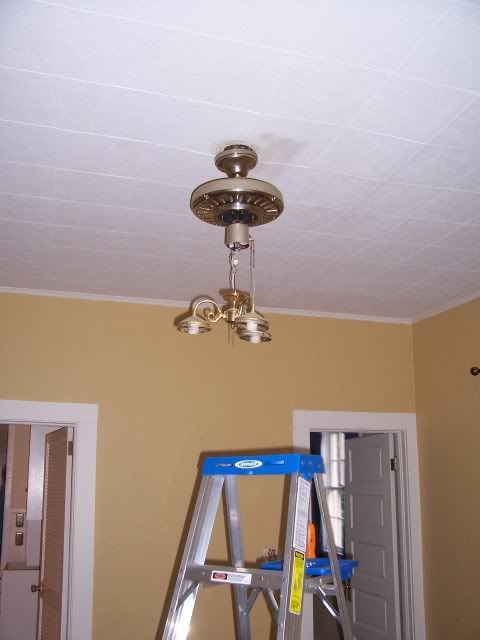
The last vestiges of the old fan (sorry for not taking a more complete 'before' picture):
I'm having trouble finding the picture I took of the chandelier, pre-makeover, but it looked pretty much like this--only older, and having been ripped unjudiciously out of the ceiling of its former home:
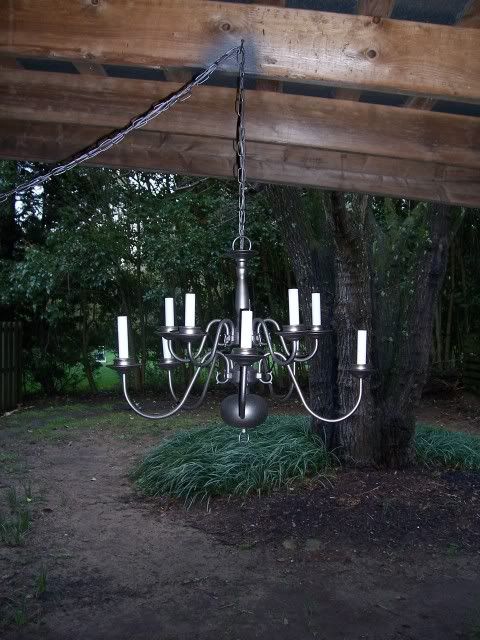
My father-in law attached a new wire and chain to the top (the old one was about 2 feet long, and since the old fan was in the middle of the room and the table wouldn't be--lest you need to crawl over it to get to the kitchen--we needed some length to swag). We then hung it in the carport to be spray-painted (which, by the way, was an interesting look; it's surreal having a fairly formal-looking chandelier hanging over the hood of your car.) I then spray-painted the whole thing, chain and all, with Valspar "Metal" spray-paint in "Graphite," which is a tad browner than it appears in this picture:
The above was taken after the "candle" sheaths were replaced. They were removeable, so we took them off pre-spray-paint and wrapped painters' tape over the bulb sockets inside.
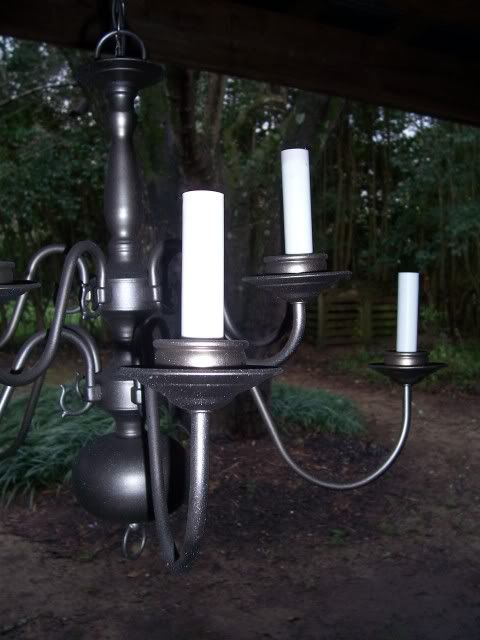
A close-up:

By the way, it wasn't dark when I took this. It was overcast. This was one project that was going on during the "great moving-weekend storm" that left puddles of mud inside and out, made our yard look like a convention of chia pets come to roost, and effectively splattered all of the tile-and-saw-dust from the goings-on with the floor all over the side of the house. But you know, whatever. We got a good chance to tell if there were any roof leaks.
So... given the chandelier, the wiring kit, and 2 cans of spray paint (I probably could have gotten away with one, but I wanted to be sure it was as even as possible), we're now up to about $27 for the whole project.
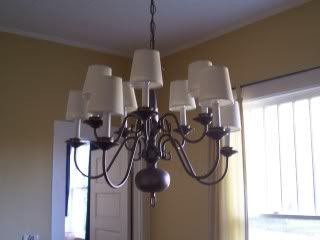
Finally, my father-in-law attached the whole thing to the ceiling where the fan had been, and we flipped the breaker. Success! In situ, with ten tiny shades attached (these we found at Lowe's):

Not too shabby, for a total of about $60 (including the shades, which weren't strictly necessary, and the extra hardware for the swag hook, which needed to be longer than the one in the kit due to how the ceiling was constructed). We're really pleased with it, and it makes the room look a whole lot different.
So.. lessons learned, I guess--it's great to have a family member who's handy with the electrical stuff (had we not--I'm thinking of that Pepsi Max commercial. "Ready?.... Nooo."), and don't try to spray-paint the underside of something while your face is four inches away from it and upside-down. Especially if you wear contacts. My eyeballs haven't fallen out yet, but it was iffy there for awhile.
More pictures to come, once the room is clear of boxes and we get the table/chairs in place. Thanks to all who helped!


Sweet! You should submit that to one of those DIY sites -- it really looks expensive!
ReplyDelete(On another note, Chia Slayer has been hard at work dispatching the herd that has roosted in our yard. But I'm glad to hear you didn't have any damage!)
I want one!
ReplyDeleteOh, wait--I have one! Hmmmm . . .
Mom
Personally, I think a garage chandelier would be a really elegant trend to start. It would lend a touch of class to those early morning and late evening grass cuttings...
ReplyDeleteDad
I forgot to mention the ground wire. You can almost see it in the carport pictures--Lowe's doesn't sell un-encased copper ground wire, so we bought the right gauge (which happened to be hot pink) and tried to strip it, which didn't work very well. So we went ahead and attached it, and I tried to spray-paint it: no-go, again. It just flakes off. So.. any ideas would be greatly appreciated. Hot pink isn't exactly my intended decor.
ReplyDeleteCan you wrap it with something like cloth tape?
ReplyDeleteYou can tell how much I know about electrical stuff!
Mom
I suggest a Jedi mind trick whenever people enter the dining room. "You cahn't see the ground wiah." [hand wave]
ReplyDeleteI'm not sure. Knit a sock for it? I can't see it in the pictures -- how much of it is exposed?
Somebody: "What're you doing, there?"
ReplyDeleteMe: "Knitting a sock for my chandelier."
Somebody: [backing away slowly]